Zarathustra
Cloudless
- Joined
- Jun 19, 2019
- Messages
- 4,385
- Reaction score
- 4,729
So I ended my previous project targeted at doing a remote water cooling system.
Essentially, the plan was to banish the noise by putting fans, radiators and pumps in another room, pumping the water through PEX tubing in the walls to my office, and cooling the PC there, and have a true no compromises system.
While this probably would have worked just dine, over time it really dawned on me how much work and money I was putting into it, and during the first test/flush of the PEX pipes in the walls it became apparently just how much of a pain in the *** it was going to drain/fill the system, how accident prone it was, and that if I was going to buy almost 10 gallons of coolant, how much money I was going to spend on just the coolant.
Then I remembered what Toast0 said in my thread on the Hardforums. Wouldn't it be easier to just run long USB and Video cables to another room, and use the PC remotely?
I kind of disregarded it, because I had tried something like that before, and it was a **** show.
Back in 2014 I had just set up a VM server and I was going a little VM crazy. I needed Kodi front-ends for my TV's, and I thought to myself, instead of sticking a client at each TV, why not just pass through video cards, and have a VM running for the front end, and using long USB and HDMI extensions?
well, I tried. Using multiple different USB over Ethernet and HDMI over Ethernet adapters that were available at the time, and it ultimately turned into a huge waste of time. Constant connection issues, etc. etc.
So I thought I'd been there and done that.
Then one night I started googling. Turns out Linus is doing just this with his systems.
Interesting I thought. I googled the Icron USB over fiber box he was using, and found it cost like $1,400 or something just for the box.
I left a snarky comment on this video about how he claims he was concerned about budget, but then is using some expensive remote USB box that kind of kills it.
But then I thought, maybe there is something less expensive?
As an alternative I found this Chinese stupid brand name:
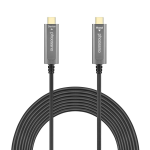
phoossno USB C to C Fiber Optical Cable USB 3.1 Type C Cable 10Gbps 65FT Compatible with Microsoft Azure Logitech Camera Aver &Vaddio & Barco ClickShare Touch Screen Kinect Intel RealSense
$153 is not nothing, but compared to $1,400 just for the converter box, it isn't bad.
Searching some more I came across some powered long Displayport cables as well:
By another stupid Chinese brand name (I keep picturing Salt Bae, but with soy )
)
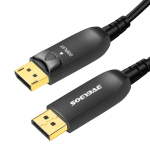
SOEYBAE 8K Fiber DisplayPort Cable 65ft/20m, 8K DP 1.4 Cable, Support 32.4Gbps Ultra High Speed, 8K@60Hz, 4K@144Hz, Compatible with Graphics Card, VR Headset, Projector
I did some bandwidth calculations, and determined I could not run all three of my screens off of one cable, so I'd need at least two, so I got two of them and a two-way displayport to dual HDMI MST hub.
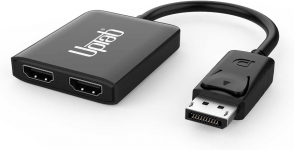
UPTab DisplayPort to Dual HDMI 4K 60Hz Adapter Multi Monitor Splitter, Converter Multi-Stream Transport (MST) Hub, DP to 2X HDMI 2.0 (DisplayPort to Dual HDMI)
And in order to connect the two male displayport connectors to eachother, I got a female to female adapter.
I also picked up this Startech USB hub as it was the only one I could find with a 10gig female USB-C port as the uplink.
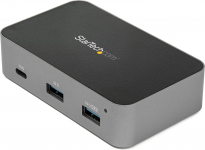
StarTech.com 4-Port USB C Hub - USB 3.2 Gen 2 (10Gbps) - 3x USB-A & 1x USB-C - Powered - Universal Power Adapter Included (HB31C3A1CS)
I was concerned latency might be a problem, so I decided to buy everything on Amazon, so that if it didn't work to my requirements, I could take advantage of their return policy.
Everything arrived several weeks ago.
When it first arrived I tested one of the displayport cables and the USB-C cable and hub, without running the cables in order to see if they were reliable and had decent latency before I did all the work.
To my surprise they worked perfectly. I did some large sample size "response time" tests and did some statistical analysis, and found no statistical difference between normal USB and monitor cables and these long ones, so I decided to move ahead.
I ran the two 65ft displayport cables and the 65ft USB-C cable through my basement drop ceiling, moved the desktop to my "server room" and hooked up all the wiring at my desk.
The main center screen worked great. The two old Dell 2007FP screens however were not working right. They were flickering on and off every couple of minutes, and just not working right. I don't know whether to blame the MST hub, or the fact that I was using multiple adapters (Displayport -> HDMI -> DVI) or that there were two active cables/adapters in a row, but in the end, I just could not get them to work right.
I returned the MST hub, and instead bought another Soy Bae displayport cable.
And because I didn't want to run into this issue again, I decided I needed side screens that actually had native displayport inputs. I've liked my old Dell monitors, so I did some searching. It turns out you can get a used/refurbished Dell U2412M for only about $80, so I decided to just do it so I didn't have to mess with any more adapters or MST hubs.
When they arrived, I ran the added Display Port cable, and hooked them up. The U2412M's looked kind of awkward with the default stands as the height was not right compared to my center screen, so I also picked up a set of the cheapest compatible VESA monitor stands that I thought would hit the right height for them.
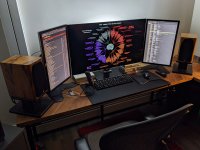
I hooked it all up, and everything works beautifully.
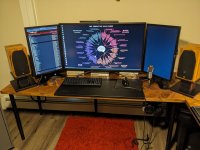
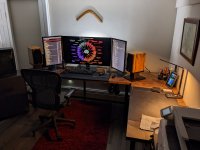
The lighting is strangely orange today and I still have my ****ty temporary rug after my old one got ruined when I had the leak, so I'll have to take a "glamour shot" another day, maybe with some of that behind the screen "mood lighting" that is so popular these days But I like the way it turned out.
Only issue I've had connectivity wise is that occasionally, during reboots the USB hub gets confused and loses the connection, requiring me to power it off and on again to get it to work, which can be annoying since it can cause me to miss the Grub OS selection screen, if I am trying to get into Windows.
Once connected/booted - however - it is rock solid. I've probably put about 150 hours of gaming into it in this condition thus far (end of System Shock remake, a short Civ 6 game, and now Starfield) and it has been rock solid, and the room has been silent and cool.
10gig USB-C is more than enough to handle my mouse, keyboard, USB DAC, USB microphone and probably lots more at the same time.
I decided I also had to buy another UPS, as there is no point to have the desktop on a UPS, if I wont have the scxreens and controls I need to safely shut it down if the power goes out The lower capacity (I don't need that much for just screens mouse and keyboard) true sine wave CyberPower units are surprisingly affordable, so it didn't set me back all that much. The new UPS is semi-hidden behind the monitor on the left.
The Desktop is currently on the floor in the server room next to the rack:
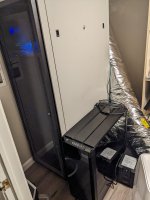
It's a little messy. I think the next step will be to transition the build into a rackmountable chassis, and stick it in the rack.
It wouldn't be a real Z project without at least some experimental customization though, so here we go:
Everything truly worked out to my liking except the fact that I did not have power and reset buttons in my office, and had to walk across the house to hit them. I did some searching for existing products for remote front panel, and the only thing I found was some power button on a keychain fob which I didn't like, so I decided to try something of my own.
I grabbed a 75ft Cat 6a cable (it had to be 6a because I was uncertain if the copper leads would be thick enough to carry the current necessary for the LED's on Cat 5.) I also grabbed an older front panel cable extension kit I had laying around. I cut the ends off, of both, and spliced them together on both ends as follows:
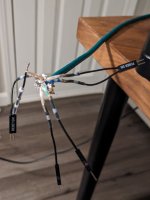
As an aside, if you splice wires and haven't come across these type of Solder Seal wire splicers get some now, they make life so much easier.
Once buttoned up with some heat shrink tubing to cover the ugly work, it looks a little prettier:
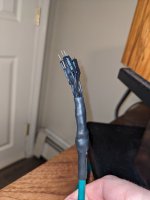
I did this on both sides, and looked around for something to connect it to.
I found these Cherry MX style switches with a built in LED to be a neat solution:
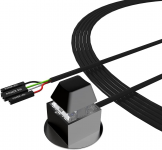
DKE Power Switch Power Supply Control Adapter Cable 2M External PC Power Button ATX Desktop Computer Case Motherboard Switch On Off Power SW Cables, Black
I picked up two of them. One for power button and power LED, and the other for reset button and HDD LED.
They come with a magnet base so they can be stuck on anyhting metal (or some round adhesive backed metal pieces to stick them to.
Up until this point I still had NO IDEA if it was going to work. I did some googling, but I never found anyone else who had tried this.
IT WORKED! Perfectly at that!
Now the only thing that remains is to stick the whole thing in a rackmountable case.
The Silverstone RM51 5U case seems really cool, but **** is it pricy for a case...
Whatever case I wind up with will be going on the bottom of the rack, just in case I have a leak, so nothing more important gets wet.
I'm thinking I'll have two Watercool MoRA radiators external to the case handle the cooling, but thats a future project, maybe next time I upgrade the motherboard. For now I am just going to sit back, play some starfield maxed out at decent temps with fans and pumps at 100% and enjoy the silence.
Side note: My snarky comment on the LTT video? Seems like he or someone on his crew may have read it, as I just saw they did this follow-up video:
I kind of like my solution better than his though.
Essentially, the plan was to banish the noise by putting fans, radiators and pumps in another room, pumping the water through PEX tubing in the walls to my office, and cooling the PC there, and have a true no compromises system.
While this probably would have worked just dine, over time it really dawned on me how much work and money I was putting into it, and during the first test/flush of the PEX pipes in the walls it became apparently just how much of a pain in the *** it was going to drain/fill the system, how accident prone it was, and that if I was going to buy almost 10 gallons of coolant, how much money I was going to spend on just the coolant.
Then I remembered what Toast0 said in my thread on the Hardforums. Wouldn't it be easier to just run long USB and Video cables to another room, and use the PC remotely?
I kind of disregarded it, because I had tried something like that before, and it was a **** show.
Back in 2014 I had just set up a VM server and I was going a little VM crazy. I needed Kodi front-ends for my TV's, and I thought to myself, instead of sticking a client at each TV, why not just pass through video cards, and have a VM running for the front end, and using long USB and HDMI extensions?
well, I tried. Using multiple different USB over Ethernet and HDMI over Ethernet adapters that were available at the time, and it ultimately turned into a huge waste of time. Constant connection issues, etc. etc.
So I thought I'd been there and done that.
Then one night I started googling. Turns out Linus is doing just this with his systems.
Interesting I thought. I googled the Icron USB over fiber box he was using, and found it cost like $1,400 or something just for the box.
I left a snarky comment on this video about how he claims he was concerned about budget, but then is using some expensive remote USB box that kind of kills it.
But then I thought, maybe there is something less expensive?
As an alternative I found this Chinese stupid brand name:

phoossno USB C to C Fiber Optical Cable USB 3.1 Type C Cable 10Gbps 65FT Compatible with Microsoft Azure Logitech Camera Aver &Vaddio & Barco ClickShare Touch Screen Kinect Intel RealSense
$153 is not nothing, but compared to $1,400 just for the converter box, it isn't bad.
Searching some more I came across some powered long Displayport cables as well:
By another stupid Chinese brand name (I keep picturing Salt Bae, but with soy

SOEYBAE 8K Fiber DisplayPort Cable 65ft/20m, 8K DP 1.4 Cable, Support 32.4Gbps Ultra High Speed, 8K@60Hz, 4K@144Hz, Compatible with Graphics Card, VR Headset, Projector
I did some bandwidth calculations, and determined I could not run all three of my screens off of one cable, so I'd need at least two, so I got two of them and a two-way displayport to dual HDMI MST hub.

UPTab DisplayPort to Dual HDMI 4K 60Hz Adapter Multi Monitor Splitter, Converter Multi-Stream Transport (MST) Hub, DP to 2X HDMI 2.0 (DisplayPort to Dual HDMI)
And in order to connect the two male displayport connectors to eachother, I got a female to female adapter.
I also picked up this Startech USB hub as it was the only one I could find with a 10gig female USB-C port as the uplink.

StarTech.com 4-Port USB C Hub - USB 3.2 Gen 2 (10Gbps) - 3x USB-A & 1x USB-C - Powered - Universal Power Adapter Included (HB31C3A1CS)
I was concerned latency might be a problem, so I decided to buy everything on Amazon, so that if it didn't work to my requirements, I could take advantage of their return policy.
Everything arrived several weeks ago.
When it first arrived I tested one of the displayport cables and the USB-C cable and hub, without running the cables in order to see if they were reliable and had decent latency before I did all the work.
To my surprise they worked perfectly. I did some large sample size "response time" tests and did some statistical analysis, and found no statistical difference between normal USB and monitor cables and these long ones, so I decided to move ahead.
I ran the two 65ft displayport cables and the 65ft USB-C cable through my basement drop ceiling, moved the desktop to my "server room" and hooked up all the wiring at my desk.
The main center screen worked great. The two old Dell 2007FP screens however were not working right. They were flickering on and off every couple of minutes, and just not working right. I don't know whether to blame the MST hub, or the fact that I was using multiple adapters (Displayport -> HDMI -> DVI) or that there were two active cables/adapters in a row, but in the end, I just could not get them to work right.
I returned the MST hub, and instead bought another Soy Bae displayport cable.
And because I didn't want to run into this issue again, I decided I needed side screens that actually had native displayport inputs. I've liked my old Dell monitors, so I did some searching. It turns out you can get a used/refurbished Dell U2412M for only about $80, so I decided to just do it so I didn't have to mess with any more adapters or MST hubs.
When they arrived, I ran the added Display Port cable, and hooked them up. The U2412M's looked kind of awkward with the default stands as the height was not right compared to my center screen, so I also picked up a set of the cheapest compatible VESA monitor stands that I thought would hit the right height for them.
I hooked it all up, and everything works beautifully.

The lighting is strangely orange today and I still have my ****ty temporary rug after my old one got ruined when I had the leak, so I'll have to take a "glamour shot" another day, maybe with some of that behind the screen "mood lighting" that is so popular these days
Only issue I've had connectivity wise is that occasionally, during reboots the USB hub gets confused and loses the connection, requiring me to power it off and on again to get it to work, which can be annoying since it can cause me to miss the Grub OS selection screen, if I am trying to get into Windows.
Once connected/booted - however - it is rock solid. I've probably put about 150 hours of gaming into it in this condition thus far (end of System Shock remake, a short Civ 6 game, and now Starfield) and it has been rock solid, and the room has been silent and cool.
10gig USB-C is more than enough to handle my mouse, keyboard, USB DAC, USB microphone and probably lots more at the same time.
I decided I also had to buy another UPS, as there is no point to have the desktop on a UPS, if I wont have the scxreens and controls I need to safely shut it down if the power goes out
The Desktop is currently on the floor in the server room next to the rack:

It's a little messy. I think the next step will be to transition the build into a rackmountable chassis, and stick it in the rack.
It wouldn't be a real Z project without at least some experimental customization though, so here we go:
Everything truly worked out to my liking except the fact that I did not have power and reset buttons in my office, and had to walk across the house to hit them. I did some searching for existing products for remote front panel, and the only thing I found was some power button on a keychain fob which I didn't like, so I decided to try something of my own.
I grabbed a 75ft Cat 6a cable (it had to be 6a because I was uncertain if the copper leads would be thick enough to carry the current necessary for the LED's on Cat 5.) I also grabbed an older front panel cable extension kit I had laying around. I cut the ends off, of both, and spliced them together on both ends as follows:
Power Switch | + | Blue |
Power Switch | - | White-Blue |
Power LED | + | Green |
Power LED | - | White-green |
Reset Switch | + | Brown |
Reset Switch | - | Brown-White |
| HDD LED | + | Orange |
| HDD LED | - | Orange-White |

As an aside, if you splice wires and haven't come across these type of Solder Seal wire splicers get some now, they make life so much easier.
Once buttoned up with some heat shrink tubing to cover the ugly work, it looks a little prettier:

I did this on both sides, and looked around for something to connect it to.
I found these Cherry MX style switches with a built in LED to be a neat solution:

DKE Power Switch Power Supply Control Adapter Cable 2M External PC Power Button ATX Desktop Computer Case Motherboard Switch On Off Power SW Cables, Black
I picked up two of them. One for power button and power LED, and the other for reset button and HDD LED.
They come with a magnet base so they can be stuck on anyhting metal (or some round adhesive backed metal pieces to stick them to.
Up until this point I still had NO IDEA if it was going to work. I did some googling, but I never found anyone else who had tried this.
IT WORKED! Perfectly at that!
Now the only thing that remains is to stick the whole thing in a rackmountable case.
The Silverstone RM51 5U case seems really cool, but **** is it pricy for a case...
Whatever case I wind up with will be going on the bottom of the rack, just in case I have a leak, so nothing more important gets wet.
I'm thinking I'll have two Watercool MoRA radiators external to the case handle the cooling, but thats a future project, maybe next time I upgrade the motherboard. For now I am just going to sit back, play some starfield maxed out at decent temps with fans and pumps at 100% and enjoy the silence.
Side note: My snarky comment on the LTT video? Seems like he or someone on his crew may have read it, as I just saw they did this follow-up video:
I kind of like my solution better than his though.
Last edited:

