The Z Build(s) 3.0 - Go Big and/or Go Home

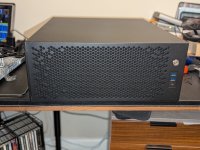
I've been thinking about replacing the MO-RA3 420 I have for my build for the new big boy, but I don't think I'll need that kind of cooling. The 420 should work for my needs, more than enough. Its going to be cooling dual AMD 9654 EPYCs and a pair of either 3090s or 2 - 4 V100s depending on which direction I decide to go.

Honestly, since I have no experience at all with MO-RA radiators I don't have a clue what to expect from a water temp perspective.

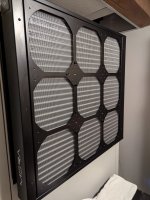
Yes, these new MO-RA IV 600's are huge but at the same time they are also the lowest fin density of any radiator I've owned, and thus designed for use with low speed/low static pressure fans, which is why Watercool strongly recommends the 200mm Noctua's, suggesting that there isn't much benefit to be had from either doing push-pull or from adding higher speed or higher static pressure smaller fans (despite offering a 140mm fan bracket as an optional part)

When I started this project, I was initially planning on push-pulling with high static pressure fans, but based on Watercool's comments I decided to just go push from 200mm Noctuas.

So, all of that said, I have no idea what kind of performance to expect. The size initially suggests HUGE performance, but the low fin density and low static pressure fans (silence optimized) suggests lower performance per unit size.

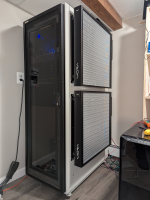
The initial plan in my head was to just get one of them, but then I measured the rack, found that two fit almost perfectly, so I was like, eff it, I'll try it.

Back when I had my Pascal Titan X I was able to maintain a temperature delta between the water and the GPU core of about 7°C with a flow rate just north of 1GPM. I had heard that you can pretty much guarantee full boost all the time if you keep the GPU at 40°C core temp, so based on this I tuned my fan profiles to result in a water temp of 33°C, and it worked well. The Pascal Titan X performed amazingly. I could even get a pretty **** good overclock at those temps.

But as ridiculous as the Pascal Titan X was for 2015, it was a 250W card. When I swapped it out for the over-the top custom power stage, and binned XTX silicon 6900xt offered by the XFX Speedster Zero EKWB edition, I could no longer maintain temps like that even with the relatively large radiators in my Corsair 1000D build (two Alphacool 480 60mm thick with Noctua iPPC-2000's in push-=pull, and one Alphacool 420mm 45mm thick with Noctual iPPC-2000's in push pull). The 400W it drew at max overclock was just too much.

Moving to the 4090 obviously did not help that situation.

Moving the system to another room, and using extended USB and display cables meant I could have no qualms about cranking up the fans to max (noisy) speeds, and that helped a little bit, but nothing could bring me back to sub 40°C GPU core temps at full load where I previously was.

It will be interesting to see where both my loop temps and my full load GPU core temps will land on this build.

I'll probably be starting with the 4090 I already have (as the 5090 seems to be made of unobtanium) but then later testing with the 5090 as well.

The theory is that the two MO-RA 600's support both my workstation and gaming system as one system with shared radiator capacity, and that I do my absolute darndest to maximize flow rate over the GPU block to minimize the delta between the core and coolant.

Realistically, while they often might be running at the same time, chances are that for extended gaming sessions, the workstation will be off, and the game system will have both MO-RA's to itself.

And in this configuration, I honestly don't know what to expect. Will the low fin density and slow-ish fans sacrifice too much performance? OR will they perform so well that I get near ambient loop temps? It could literally go either way, and I don't have a freaking clue which it will be.

I pretty much expect the "server room" (closet/old disused laundry room) air temperature to become one of the limiting factors. In the future I am likely going to have to work on some way to cool that room 😅
 
Instead of the mass of small pumps, have you considered using one of the larger Iwakis instead? It was something I was always interested in using, but I've never gone with anything other than a D5 or the old swiftech bayrez DDCs.

 
I've seen the older mo-ra3 360 cool a CPU and 7 Titan V GPUs with a single d5 pump.

The IV 600 will be able to dissipate far, far more cooling. You'd realistically only need one for all the components you're looking to cool, so having two is going to be a extreme overkill. Haha.

Also, I do highly, highly recommend going with as few of the biggest fans you can buy for them. Wiring for 9 fans is a real PITA.
 
Also, I do highly, highly recommend going with as few of the biggest fans you can buy for them. Wiring for 9 fans is a real PITA.

Trust me, I know. I have 24 fans in my current build. It is a bloody nightmare to get right whenever I have to break into it.

I do like the modern fans that have those little push connectors to link together many fans on radiators though. I had that idea years and years ago, and posted it encouraging someone to taker advantage of it. Looks like Corsair finally did with their LX series fans. It came too late for me though :p

At least with the new MO-RA IV series, the fan bracket has built in fan splitter/distribution to make that easier (but only for the 200mm models, not for the 140mm brackets)
 
Wait what? I've seen a review of the radiator but he didn't mention that or I missed it. I think he was using, or tried to use, some fans with physical connectors on them that you could mate together without wires. Although he ended up having to use wires anyway because the mounting for the fans left a space between each fan that didn't allow them to connect to each other.

You're saying there is a built in wires/connectors on the bracket that allows you to connect the fans to the bracket and the bracket to the power/signal source?

Yep!

PXL_20250131_022228132.jpg


PXL_20250131_022244299.jpg
 
Last edited:
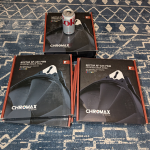
The first 9 200mm fans came in. I was going to order them all at once, but the seller with the best price only had exactly 9 left in stock, so I figured that would do for now.

I keep forgetting how massive these things car.

Die Coke (sorry, once again no banana) for scale.

1738357623738.png

I'm undecided what color to use for the corners. I mean, I really don't care that much. I'll probably just go with black, but white might add a nice little accent for contrast.
 
Wait what? I've seen a review of the radiator but he didn't mention that or I missed it. I think he was using, or tried to use, some fans with physical connectors on them that you could mate together without wires. Although he ended up having to use wires anyway because the mounting for the fans left a space between each fan that didn't allow them to connect to each other.

You're saying there is a built in wires/connectors on the bracket that allows you to connect the fans to the bracket and the bracket to the power/signal source?

@LeRoy_Blanchard

This is actually way nicer than I expected.

I have one of these Noctua 200mm fans in my testbench build already (in the front of a Phanteks Enthoo Pro case (I had to Dremel it down a bit to make it fit) but I had forgotten that they come with a detachable cable.

1738365273110.jpeg

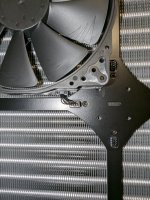
Once you pull the long cable off, you are left with a short little pigtail, that is just long enough to properly mate with the fan header on the fan bracket.

1738365335039.jpeg

Just holding the fan in place to illustrate this, it winds up being next level when it comes to cable management. This is huge and is going to save me a lot of headaches.

Only downside is I wish the Noctua 200mm fans moved more air.
 
Spent some time opening Noctua fan boxes, installing black vibration pads, and installing them on the first radiator bracket last night.


Unlike most radiator screws, Watercool has gone with a short screw that only goes through the side of the fan that is closest to the radiator, unlike the long ones that go through both sides.


...and they use a 2.5mm allen key, which I am lucky I was able to find. I have hex pattern bits for my screwdrivers, but none of them were slim enough to go through the top fan hole to reach the screw behind them.


This is not difficult stuff, but it is a lot more time consuming than I gave it credit for before starting.


And then - of course - when I got to the last box, it looks to have been tampered with. Missing the fan cable, and the box with all the silicon vibration dampeners, so it will have to go back, and I only have 8 fans until the next arrives...

PXL_20250202_030139454.PORTRAIT.jpg

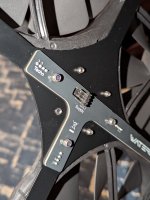
I also discovered that while the brackets with the integral fan splitters are really cool, there is one annoying thing about them:

PXL_20250202_030205725.PORTRAIT.jpg

They are supplied on the back by a male fan header.

Apparently if you buy one of Watercools two controllers that assemble into the radiator on the side on the bottom (standalone auto one, or one that feeds off of a fan header in the PC) you get the male to male fan cable in the package. Since I have like three Aquaero 6 devices already though, I wasn't planning on doing that. I really like my Aquaero's, and more importantly, they are already paid for.

I poked around a bit, and was unable to find any male to male fan cables to buy, so I will have to make my own fan cables.

This is probably for the best anyway, as they are going to need to be quite long in my application. This will force my hand to actually spend the time to make my own cables. Otherwise I would probably just have strung together a series of fan extension cables, which would not have been very reliable.

Just to make sure there wasn't anything funky going on, I grabbed my multi-meter and did some brief continuity testing. On the fan header I randomly selected on the front - as expected - all pins showed continuity in the same order on both sides, except the RPM pin which was not connected. (it is probably connected to one of the fan headers on the front, but I am not sure which one. (probably the one that says "tacho" on the back) The reason for this is that RPM signals work by pulses. If you have two fans sending back pulse data on the same conductor, it will be read as twice the RPM. Tie 9 together - and if there is enough separation in the signal, it will be read as 9x the rpm)
 
I had originally planned on making my own brackets from ABS for the reservoir mounting, but in a moment of weakness I thought "why reinvent the wheel" and ordered those too.

They arrived last week, and I installed them yesterday.

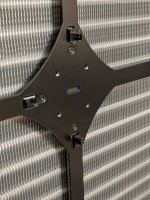
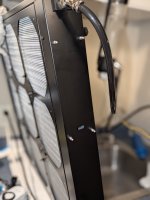
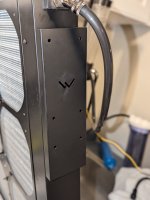
The bracket comes with these screw in pins:

PXL_20250201_025808234.PORTRAIT.jpg

The pins then press into matching slots on the back of the brackets:

PXL_20250201_025846187.PORTRAIT.jpg

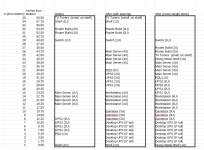
In my original plans (that only existed somewhere in my head) I was going to mount the reservoir much further down, such that a pump hanging off of the bottom of the reservoir can push coolant straight into the bottom port of the radiator as an inlet.

The top radiator port was going to be the return and enter back into the reservoir (at first) and when I got the second one set up, I was going to run it into the second reservoir below. This was going to be made easier and more flexible by using some Koolance QDC's on the line exiting the radiator. With the brackets as high as they are, even if I mount my reservoirs at the very bottom of them, I unfortunately think there just isn't enough space there to include the QDC's now, which is a shame, and means I am going to have to get more creative when I attach the second radiator to the loop.

...or maybe I'll just do them at the same time to save some effort.

I still very much plan to have QDC's on the lines going to the computers though, as this will facilitate easy future upgrades.
 
Today I went back to the drawing board (if only a tiny bit)

Some Prepwork

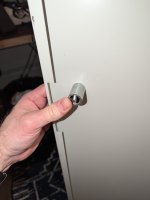
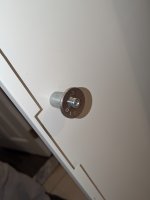
I spent some time looking at the rack a few days ago, and noticed that the side panel I was planning on hanging everything from is really only held on by some plastic latch handles:

View attachment 3456

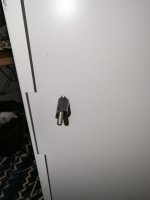
Those two little black handles, and a wimpy lock (for which I do not have the key) are what secure the whole thing in place.

I put some test weight on it (me, hanging from the side of the thing), and ****, the panel started to pull away from the rest of the rack. So I needed to reinforce that puppy before I start hanging heavy water filled radiators and reservoirs from it.

Looking at the rack from the inside I noticed that the back of the main rails (where you screw in the sliding rackount kits) has 1/4" screw holes about every half inch running top to bottom on both the front and rear of the unit.

I decided to drill matching holes on the panel itself, and install some machine screws through the holes with bolts on the back. I figured that should secure it up nicely.

I figured I'd pout one hole front and back up top, in the middle and down at the bottom, 6 bolts in total. That ought to do it.

I noticed the rack shelves were in the way up top and on the bottom, so they would need to come out for me to gain access.

These things are heavier than they look:

View attachment 3457

They are made of 1/8" thick sheet metal, with reinforcement in many places. Real heavy.


They came in the rack, and probably date back to the 90's. I haven't seen modern rack shelves (this is the one and only rack I've had the pleasure of working with) but I am going to go out on a limb and suggest "they probably don't make them like this anymore".

After a quick trip to home depot to buy the fasteners, bolts (and some lock washers for good measure) I started the drilling. I bought a new kit of drill bits when I was there as I did a massive home improvement project this summer, and have either lost or burnt out most of my previous drill bits.

I wound up with some Milwaukee "Shockwave Titanium" bits, because they were on sale. (I have no tool brand loyalties). They claim they stay sharper longer, and I was actually pretty impressed with the first hole. I applied a little cutting lubricant to the bit and started drilling, and it went through the sheet metal like butter.

I'm not sure about the "stays sharper longer" claim though, as already by the second hole it took some more force. By the last, I had to put some muscle into it.

But all the holes are drilled, and bolts installed, and the panel is now very secure.

View attachment 3458

Because I was worried about the bolts interfering with the shelves (or other things) when I put them back in, I flush cut the back of the screws with the tightened down nut using my oscillating tool and an "extreme titanium metal/whatever" blade.

View attachment 3459

In this process I learned that oscillating tools can loosen tightened bolts (even with a lock-washer in place) so once done, I re-tightened them all.


Here are the top four screws in place. (the bottom two are hiding behind the Corsair 1000D)

View attachment 3460

That's all I got to that day.

I am going to leave the shelves out for now, as if I put them back in, they are probably going to get in the way, when I go to mount the radiator wall mount brackets.

Unfortunately, in one of my many trips behind the rack, I must have tripped over and broken one of my 65ft display port cables connected to the back of the Corsair 1000D :/

View attachment 3461

Now I am going to be without one of my side screens until I can get and route a replacement.

That's a bummer, especially since they are like $90 each, and a pain in the *** to route across the house to my office... Oh well. **** happens. I'm sure this won't be the last mishap before this project is done, and if it is the worst, then I will have been pretty **** lucky!


For several days now I have been thinking that I really liked my pipe-based metal spacers and how they worked to provide backing and let me tighten my screws as much as I deem necessary, and I was disappointed I hadn't thought of that sooner and done it when originally anchoring the side panel, as I definitely noticed it deflecting a little when I tightened it down.

I had mostly resigned myself to just let it be, but then when I attached the brackets to the panel last week I noticed the brackets overlapped one of the panel anchoring screws, pressing it slightly askew. (sorry I never took a pic of this apparently, thought I had)

I thought to myself, I really ought to have countersunk those screw holes....

Now I had two reasons to go back, take the brackets off the thing, and re-do my earlier work. So I did.

It was then I realized that since I haven't done a lot of work with sheet metal in my life, I'm not really sure how to counter-sink screws in sheet metal.

So I invented a way. I'm not saying I'm the first in humanity to do this (in fact, I almost guarantee I am not) but I did come up with the method myself.

After getting the panel off the side of the rack (which was a minor production, as it is locked with a key, and I never got that key when I bought it used on Craigslist years ago, but I have power tools. Nothing is impossible when you have power tools) I stuck one of the screws I wanted to counter-sink through the hole.

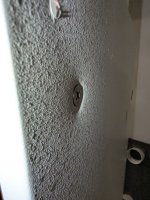
On the other side, I first put an old piece of primochill tubing over the screw for centering purposes, and then placed one of my pipe-based spacers over it, and then added some beefy stainless washers and a nut, and tightened it down.

PXL_20250201_020702749.jpg PXL_20250201_020843404.jpg PXL_20250201_021400060.PORTRAIT.jpg

...and then I just continued tightening it (carefully) until the metal deformed and the screw was flush with the front:

PXL_20250201_023128923.jpg

...and it seems to have worked!

I don't know if I have work hardened the steel or anything stupid like that in the process, but it really did the job, looks nice, and still seems strong.

I only really needed one of those screw holes counter-sunk for fit reasons, but just because I hate asymmetry and inconsistency I did it to all of them.

Now the panel is reinstalled on the rack, with it's nice counter-sunk screw holes and the spacers behind it.

1738469135703.png

Only problem now is, I no longer have enough spacers for the Watercool brackets. I am going to have to grab my cut-off saw and make some more.

Except today was snowing, nasty, wet and cold.

I'll work in the cold, but I'm not going to do this while wet, so it will have to wait.
 
Last edited:
Oh okay, so you DID make a thread about this project over on this site. I was following it over on [H] but wondering if you had made a thread over here. I guess my search-fu sucks cuz I didn't see it before. I see it now though.

Your projects are always incredibly interesting!
 
Oh okay, so you DID make a thread about this project over on this site. I was following it over on [H] but wondering if you had made a thread over here. I guess my search-fu sucks cuz I didn't see it before. I see it now though.

I linked it in the first post 😅

(Though to be fair I started over there with the first few posts and then caught up to where they are both simultaneous as I was having some early issues with image uploads being rejected here, which have since been fixed)

Your projects are always incredibly interesting!

Thank you sir!
 
Become a Patron!
Back
Top