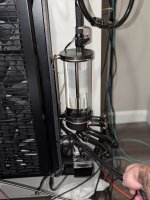
The Z Build(s) 3.0 - Go Big and/or Go Home

Secondly, since this water loop is going to be cooling two PC's (and maybe even more later) and I can't predict when one or the other will be on, I wanted something that could manage the loop independently of the PC's, so I can turn them on or off at will, and have the loop continue to function. And that's the beauty of the Aquaero. You plug sensors into it, and program its profiles, and it takes care of itself. No need for it to communicate with the PC at all.
Oh shiiiat man, that's pretty awesome!

And this is where I had to stop, because the other Aquaero I need is still in my current workstation, which has provided a bit of a dilemma that has been slowing me down. There are also other things in the loop on that machine I need in the new loop, like the reservoir, some flowmeters, temperature sensors, etc.

You see, once I break into that workstation, it is down until phase one of the project is complete, and I use that thing for work, so I can't have it down during the week.

This fact has made me hesitate when working on the project some weekends. Would I really have enough time to finish it? This has wound up being a large contributor to the fact that this project has been making such slow progress lately.
Aahh yyyeeeaaahhh, I know how that game goes. It's understandable.

Unfortunately when it arrived there were signs that it had been opened. The bracket had been removed from the bottom and rotated in the wrong orientation, and there were fingerprints on the otherwise shiny cold plate.

Normally this would piss me of and have me initiating a return and replace, but then I'd have to sit around waiting for another cooler to arrive, and miss the opportunity to make progress for yet another week, so I cleaned it off, re-oriented the mounting bracket, and prepared to install it.
Oh well sh1t dude! Over $100 to deal with that crap?! But I understand that you don't want the project delayed even longer. I know that can be frustrating. But yeah my @ss definitely would have returned that sh1t.

I'm a little rusty at this, having not done good wire management in a long time, especially in a place where it would all be visible (unlike the good old "shove everything behind the motherboard tray, and mash the rear cover closed whether it wants to or not" approach. 😅)
Hahahahahahahahaha I know that game too!
 
I'm not ready for custom loops. I think I'm aged past doing that at this point.
Same here. If I'd been doing them 10 years ago I'd be willing to keep moving forward with them but starting from scratch at this point is more time and money than its worth for my setups.
 
Same here. If I'd been doing them 10 years ago I'd be willing to keep moving forward with them but starting from scratch at this point is more time and money than its worth for my setups.

Yeah, I knew already before starting this project that I really don't have the time for this **** anymore, and actually executing on the project has been proof of that.

That was kind of the motivation though.

I want to do it once. Build an overkill water cooling loop that I will never need to upgrade, and make it modular with QDC's allowing me to easily swap out components as time goes on.

With a little luck, I'll be able to go a long time with the only needed work being to replace the coolant every 1-2 years.

At least that is the hope.

Man if it wasn't for the waterblock I might want it. I'm not ready for custom loops. I think I'm aged past doing that at this point. lol.

We will have to see how that goes.

I haven't listed it yet, as I still need to clean the block a little before taking pictures and trying to sell it.

It is generally in very good condition (pretty much like new) except a little of the blue dye from mu old coolant dried in one spot inside the block and just won't come out no matter how much I flush it. It is going to need to be opened and scrubbed a little.

Traditionally it is nearly impossible to sell used GPU's with water blocks installed on them. Most water cooling enthusiasts do so for high end systems, and are less likely to want a previous gen GPU when you upgrade...

...but with how weird the GPU market is now, and the 4090 still being the second fastest GPU out there, it may be different this time.

I'm going to try to sell it with the block, but if I don't have any takers, I may reinstall the stock cooler.

For someone who does want to water cool a 4090 though, it will likely be a great deal, as the EK water block on this thing was not cheap, and I bet I'll barely get much more for it with it on there, than I'd get for the stock 4090.
 
I thought this was going to be the weekend I fill and leak test the radiator portion of the loop.

The Bad News:
I overlooked some fittings I needed.

The good news:
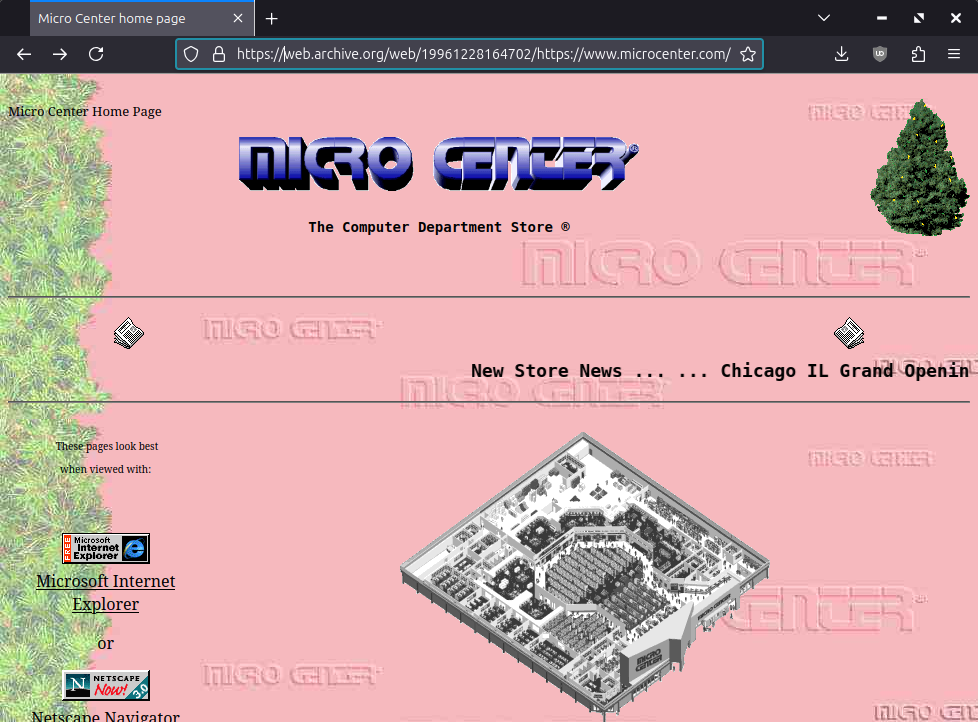
MicroCenter has them.

The Bad News:
MicroCenter closes at 6pm on Sundays

The Worse news:
I didn't realize this until I got there,

It may only be just over 10 miles as the crow flies, but this being the greater Boston area, there is traffic 24/7 these days, so that was a waste of an hour and 27 minutes round trip :/

I could have sworn MicroCenter used to be open later in the past, but a review of their hours page on the Internet Archive's "Wayback Machine" indicates they have closed at 6pm or earlier on Sundays since time immemorial.

I must have just randomly made my mid-build excursions to MicroCenter to get the random bits and pieces I needed to finish the job over the years on Saturdays and assumed they were open later all days of the week 😅


Lol btw:

1757961598245.png


There is even scrolling news text 😁
 
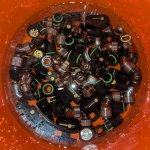
Just some bends, adapters and the like getting a much needed bath in a Home Depot bucket.

PXL_20250928_225503569~2.jpg

People forget how important cleaning is, even new parts. It's almost shocking the amount of machining oils have risen to the top, and that's after giving them a spritz of vinegar, a quick brush with a tooth brush and a rinse in distilled water before the soak.
 
Alrighty,


So there has been progress, but it has also been slow.

There has been a lot of last minute making of custom wiring.

The top radiator needs 5 wires:
- Two 4 pin wires for the fans, Fan1 and Fan2
- Pump Wire, with splitter for boiled little pump fan (4 pin extension with splitter)
- LED wire (4 pins)
- Digital (Calitemp) temperature sensor (4 pin wire for Aquabus)

The bottom radiator needs 7 Wires:
- Two 4 pin wires for the fans, Fan1 and Fan2
- Pump Wire, with splitter for boiled little pump fan (4 pin extension with splitter)
- LED wire (4 pins)
- Two digital (Calitemp) temperature sensor (4 pin wire for Aquabus)
- Flow sensor (with integrated temp sensor) one four pin, and one two pin Dupont connector

It doesn't sound like a lot, but once you start crimping them one by one, soldering splices, shrinking shrink sleeving, continuity testing each conductor, it just kind of adds up.

There has also been some last minute noticing that heat shrink sleeving is remarkably rigid after it is recovered down to its final size.

I've had to trim away material from the custom brackets I made to make the wires fit through them where they need to go, and even then it didn't help all that much. For instance, look at the wire coming off the pump (and little boiled fan) It was supposed to be pulled up through the holes and then out through the liquidtight connector, but that just wasn't happening, so now it is just kind of flopping around there.
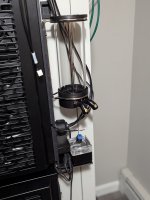

PXL_20251006_041025091.PORTRAIT.jpg


At some point in the future I'll probably make some sort of cover for that so I don't have to look at it, but for now we are moving forward.

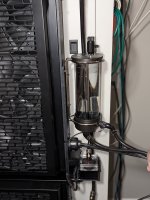
All of the mounting brackets are finally attached. The reservoir brackets are screwed into place, the pumps are mounted and all of the wiring has been shoved through the liquid tight connector, both top and bottom (but I only have a pic of the top here right now.

I've made many trips to Microcenter in the last week or two, to get fittings and bends I need. Sometimes they have them, sometimes they don't. Their Bitspower fitting and bend station used to be much better stocked, but now it is hit or miss. (I presume tariffs are somehow to blame, as these things come from Taiwan)

In assembling this stuff, I noticed that the part of the rotary fitting that peeked through my two layers of mounting brackets was so small that I could not get a good grip on them with my fingers to tighten them down. I only had a few millimeters of grip surface to work with, and once I twisted it, and had to rotate the rotary fitting back, it started undoing itself again.

I did some googling for a solution and found these nifty Japanese non-marring pliers on amazon.
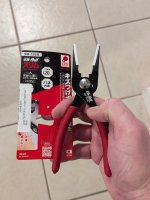

PXL_20251005_023159102.PORTRAIT.ORIGINAL.jpg

They helped get it done.

I was finally at the point where I thought I was going to connect all of the tubing to the radiators and get some water flowing through the radiator side of things today, but then I got stuck again.

Because once I do that, I am not going to be (easily) able to disassemble the reservoirs again, and I want to install hardtube extenders inside the reservoirs to direct the flow of coolant entering and leaving the reservoirs.

You know, have cool water flowing back from he radiator at a similar location that the intake for the water blocks are, to minimize recircling of hot water returning from the block back into the block. That sort of thing.

This is what that looked like in my old implementation, if an image helps illustrate it:
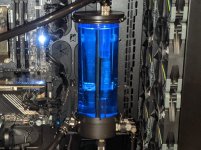
416000_build_Dec2020-crop.jpg


Note the tubes coming up from the bottom and down from the top. This avoids intakes and returns that are too close to each other just circulating the same fluid over and over, and is pretty important considering my loop depends on the coolant "mixing" in the reservoir.


EK designed this to be a press fit, where a little O-Ring sits in a groove on the inside of the reservoir and grips the hardtube you shove into it:
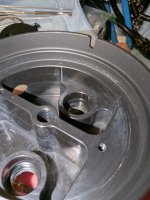

PXL_20251006_041659093.jpg

The top port in this picture does not have an o-ring in the groove. The bottom has one.

(yes, I know I still need to clean this quite a bit. That old coolant gunk is surprisingly difficult to remove!)

I have quite the selection of O-Rings of many different sizes, including standard G1/4 O-Rings and several others from various industrial O-ring samplers, but none of them work. Several stretch around the 16mm hardtubes but they won't go through the hole because the outer wall of the hardtube sits flush with the hole in the reservoir cap. But when they are not stretched around the tube, they are too small to stay seated in the groove inside the hole.

I need a very specific size of o-ring for this to work, that expands large enough on it's own to stay in that groove when I shove the 16mm OD hardtube through it. Of course, the EK Res x4 is discontinued, and none of the manuals say anything about the size of these O-Rings.

An educated guess is that these are the same O-Rings EK uses in their HDC hardtube fittings. With the way things are going for EK, parts are hard to get for their stuff now. I knew this might be a problem, but there just werent any other large reservoirs on the market with the quantity of inlets and outlets I needed, so I took that risk.

Titanrig.com still had two bags (6pcs each) of replacement EK HDC fitting o-rings for 16mm hardtube. Fingers crossed that once they get here they will actually fit...

And thus we have yet another week of "make minor progress, then get stuck and wait for stuff I ordered to arrive". That seems to be the way this project is going.
 
I just realized I forgot to update work on the electrical control box.

First I bought a Delta dual volt (12v/5v) power supply from Mouser.

I bought a large-is (10"x10"x4") electrical junction box to use as a control box for the fans and pumps.

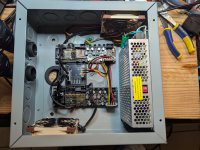
The intent was for this box to house the power supply, two Aquacomputer Aquaero 6 LT controllers a small USB hub and a Farbwerk LED controller (Aquabus version) for the LED's.

The reason for selecting the Aquaero 6's are twofold. Firstly, I already have three of them (two of which are in my current build) and I have come to quite like them. Secondly, since this water loop is going to be cooling two PC's (and maybe even more later) and I can't predict when one or the other will be on, I wanted something that could manage the loop independently of the PC's, so I can turn them on or off at will, and have the loop continue to function. And that's the beauty of the Aquaero. You plug sensors into it, and program its profiles, and it takes care of itself. No need for it to communicate with the PC at all. (You can hook it up via USB and have pretty charts and graphs, and have it read system sensors if you want too, but I won't really be doing that. Well maybe the pretty charts and graphs/.

IN working on the box, I remembered something I had forgotten. The Aquaero can be re-flashed with a dedicated firmware that turns it into a slave-device, that adds additional fan/pump channels to the master Aquaero. I decided to change my plans to do this, because that way only the Master ever needs USB connectivity, and the need for the USB hub goes away.

Even so, between the power supply and the aquaeros, there will be some generation of heat inside the box, so it will need some cooling too.

So it was time to make holes:

View attachment 3880

View attachment 3879


The holes did not wind up being 100% clean, so I decided I was going to come back, sand them, and give them a coat of paint so they didn't look too terrible.

But first I wanted to test fit the fan:

View attachment 3878

Oh, and I would need to drill mounting holes in the C channel bars I mounted to the back of the rack as well, so I figured I'd get all of the metal work out of the way before painting.

I decided to drill the holes with my trusty DTAP kit, so I wound up with threaded holes directly in the bar stock and didn't have to use any nuts.

View attachment 3877

These Greenlee DTAP kits (I got one metric and one SAE) have been very useful!

I also remembered I'd need some mounting holes for the power supply, the Aquaero's and the Farbwerk, as well as a pass-through hole in the back for wires to go to the PC's, so I needed to drill and test fit those too before painting:

View attachment 3876

I then tried desperately to find a good paint that would match the general color of the thing. Some Googling suggested that Rustoleum's "Industrial Choice" in grey was a good match, but it proved pretty difficult to find. I wound up special ordering it from Granger, and picking it up at their local store.

When I got it, I guess I found out why. It is labeled for "Industrial or Professional Use Only". Whoops.

Well, I am a "professional". Maybe not the type of professional they had in mind, but....

And I am definitely not a professional painter. I absolutely suck at it:

View attachment 3875

View attachment 3874

It wasn't as good of a match as suggested, so I wound up having to paint the whole thing, just to cover the exposed metal from my cuts.

There is pretty bad orange peel throughout, but I am going to live with it.

I also had to paint the lid or it wouldn't match, and when doing that, some crap blew in the wind and landed on it, I tried to quickly remove it but it was too late. I am going to have to re-sand it and try again.

And this is where I had to stop, because the other Aquaero I need is still in my current workstation, which has provided a bit of a dilemma that has been slowing me down. There are also other things in the loop on that machine I need in the new loop, like the reservoir, some flowmeters, temperature sensors, etc.

You see, once I break into that workstation, it is down until phase one of the project is complete, and I use that thing for work, so I can't have it down during the week.

This fact has made me hesitate when working on the project some weekends. Would I really have enough time to finish it? This has wound up being a large contributor to the fact that this project has been making such slow progress lately.

I thought I might do it with the extra day over labor day weekend, but I wound up having some other things to do that took my time, and it wasn't in the cards.

But I think I have a solution for that. In my next post.


Also,

Remember my control box above?

Well there has been another change of plans here.

Originally I was going to use two Aquaero 6's one as a master and one as a slave to give them the fan outputs and sensor inputs I needed. To be clear, I would never have bought them with the intent of doing this. Aquacomputer sells much better and more affordable aquabus expansion devices for this purpose (like the QUADRO and OCTO), but since I already had two, I figured I'd just use them that way.

I even actually installed this configuration, which wound up looking like this:

PXL_20250928_003939882.jpg


I made an incorrect assumption - however - that means this won't work.

You see, on early versions of the Aquaero 6 there was an "Aquabus high" and an "Aquabus low" connector. I'm not quite sure what the distinction was, or how they were supposed to be used, but at some point Aquacomputer made a firmware change that instead used the "Aquabus low" connector as a second flow sensor connector. UNless you had a really early Aquaero 6, you've never seen one with "Aquabus low". They have all been labeled Flow 2 instead.

Now, the manual says that when you flash the salve firmware to the Aquaero 6 you get 4 fan outputs, some temperature inputs and one flow input. I made the assumption that this was just left over old language from back when Flow2 was still "Aquabus low", and that this thus meant that I was actually going to get two flow sensor inputs from the slave Aquaero.

Well, it turns out that assumption was wrong. There is just one additional flow sensor input, which stinks, because in my design I need four flow sensors in total.

I want one flow sensor to monitor the flow of the radiator loop, and then one each for the block loops (workstation threadripper CPU block, game machine 9950x3d CPU block, game machine 5090 GPU block)

The two Aquaero's only gave me three.

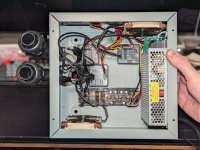
So I checked the Aquaero manual, and found that the Aquaero 6 supports up to two Quadro's over Aquabus, and they have one flow sensor input each, so I ordered them, and once they arrived, drilled some new holes in the box, and installed them:


PXL_20250928_032333806.PORTRAIT.jpg


This is not the mounting orientation I would have chosen, but I wanted to re-use the mounting holes from the second Aquaero, so it is what it is.

I'm going to need to do some wire management cleanup down the road though.

There were two minor complications here. One was that unlike the Aquaero, the Quadro does not use a standard fan connector for the flow sensor. Instead they use some annoying little mini-connector. Their newer flow sensors come with both connectors, but since I am reusing some older ones, I had to also buy the special cables.

Once I had everything hooked up, the Aquaero did not detect either of the Quadros over Aquabus. It turns out that when you use more than one of these things, you have to manually set one of them to use the secondary bus address, or they conflict with each other. This involved temporarily installing the included USB cable to one of them, loading it up in Aquasuite, switching the aquabus address to the second address, and then reconnecting everything, and then they all showed up as expected.

Hopefully I will have more updates soon.

I know that at the onset of this project I said it would be a slow burner, but man, it has exceeded my every expectation in that regard. I am ready for this to be done.
 
So, this was a long weekend, and I thought I'd get a lot done, but other things got in the way as always.

I spent way too much time trying to "upgrade" the VM I use for work from Windows 10 to Windows 11, which was made really difficult because it was originally installed with traditional booting without EFI, and without any TPM or secureboot settings. Microsoft in their wisdom seem to block upgrades of systems they have deemed "incompatible" even after those compatibility issues have been fixed. Took me like a day and a half, but many failed upgrade attempts, some file backups, and about 3 clean installs later I finally got it running, including activation with the digital license. Everything with Windows is needlessly complicated. This would have taken me 15 minutes with Linux...

Anyway, I did make a little bit of progress.

An educated guess is that these are the same O-Rings EK uses in their HDC hardtube fittings. With the way things are going for EK, parts are hard to get for their stuff now. I knew this might be a problem, but there just werent any other large reservoirs on the market with the quantity of inlets and outlets I needed, so I took that risk.


The O-rings arrived, and my educated guess was correct. These fit perfectly in the little grooves.

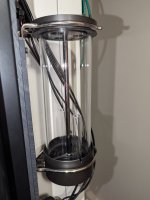
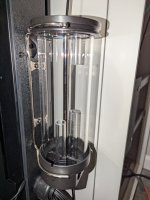
I also spent some time cutting hardtubes to the length I think will be the most ideal for the reservoirs, and then sanding and reaming them to make sure there are neither pieces of plastic entering the loop, nor sharp edges that cause problems.

PXL_20251014_172044821.jpg
PXL_20251014_172101568.jpg

First pic is the top reservoir. There the intake to the workstation CPU block will be one of the tubes. The second tube will be the return from the bottom radiator.

I figure this way the CPU intake will have access to the coolant most recently returned from the radiator first, so it is less likely to re-circle hot coolant.

On the bottom without tube risers will be the return from the CPU block as well as the intake for the pump that will push it through the top radiator.

Next pic is the bottom reservoir. There there will be flow from the top radiator in the top of the reservoir. I decided to go with a 50mm long tube there just so it wasn't dumping straight out the top. I thought that might make a lot of noise if the reservoir isn't completely full.

The bottom two tubes are for the intakes to the CPU and GPU block for the game machine. Their returns will be on the bottom without tubes, as will the intake to the pump that pushes water through the bottom radiator.

The stock tubes that come with these reservoirs were 150mm long, but I decided to go slightly shorter, at 100mm for the intakes, figuring it would be easier during filling to avoid the water level going too low and starving any of the pumps, thus damaging them. I think the offset is enough to accomplish my goals, to minimize the amount of re circulation of hot coolant.

I'm going to try to assemble the tubing and get some water in the thing and start flushing the final assembly this week, after which I will move on to the CPU block on the workstation, and once that is done, actually closing the lid and installing it in the rack.

After that I will move on to the game machine build.


Here are some of the things that slow me down.

These cute little furry jerks try to guilt trip me out of getting anything done at all. The grey one just wants to play 24/7. The black one just wants affection 24/7

I put a gate in to keep them out of my work area so they won't get hurt on any of my sharp tools (and won't start knocking **** onto the floor)


(looks like I still have some black ABS plastic dust to clean up. That **** got everywhere)

They say that dogs evolved "puppy dog eyes" because they had an evolutionary benefit in gaining sympathy from humans.

I wouldn't be surprised if the same were true for sad cat vocalizations.

These two jerks constantly try to guilt me out of spending time on my projects 😅
 
If I was living in the house I intended to die in... I'd build the loop into the house. Maybe figure out how to get it its own mini split setup, acoustically isolated from the user position.

Right now using watercooling for sound reduction is all for naught for me - I have to use a loud A/C window unit to take care of the heat that is so efficiently removed from the system...

Well, I don't know if this is the "forever home" but we do own it, so we do have some flexibility that I didn't have back when I rented. I feel like I have no problems making some changes, as long as I can undo them should we ever want to sell.

Once this computer project is complete, I have another few heat pump and EV charging projects to tackle, but after that there is a good chance my little server room/closet will get it's own little cheap mini-split to keep the temps in that room under control.

This is going to become necessary, as with the big system going full blast I don't think I could close the server closet door as it qould quickly become too hot in there.

The way my house is laid out, the finished basement (where both the server closet and my office are) traps a lot of heat. The house has old school traditional hydronic radiator distributed heat fueled by natural gas. It has two zones, one upstairs and one downstairs in the finished basement, but I don't even know why they bothered running the second zone downstairs. I turn it on with a thermostat set to 66°F/19°C just in case, but even in the dead of the New England winter it never needs to turn on.

Right now - for instance - we are in that weird time of year where it is ~50°F (~10°C) outside during the day. The upstairs is a bit cool, on the cusp of maybe needing heat, but the finished basement is uncomfortably warm at times. I installed a DIY 4 zone heat pump last year, but heat pumps have to have all of their zones moving heat in the same direction (either all cool or dry, or all heat) you can't set one zone to cool and another to heat.

It almost seems wasteful to dump the trapped heat in the finished basement outside during what most would consider heating season.

I have toyed with the idea of - for the winter season - running a 4" duct through the ceiling in my server closet and attaching it to a vent upstairs (the kitchen) and hooking up a portable AC unit to it, cooling the server closet, and blowing the resultant hot air into the kitchen upstairs to try to take advantage of the trapped heat downstairs, and move it where it is more beneficial in my house.

If I really wanted to, I could then cool the server closet down to like 60°F-62°F / 16°C-17°C (usually the lowest those portable units will go) for a heavy gaming session without the guilt associated with wasting energy. At least not as much. There will still be some energy use by the portable unit, but that will be partially offset by less need to heat the upstairs, and compared to the 𝚫T to the outside this is a relatively small and low energy demand job.
 
I have toyed with the idea of - for the winter season - running a 4" duct through the ceiling in my server closet and attaching it to a vent upstairs (the kitchen) and hooking up a portable AC unit to it, cooling the server closet, and blowing the resultant hot air into the kitchen upstairs to try to take advantage of the trapped heat downstairs, and move it where it is more beneficial in my house.
That's actually an interesting idea. I think you should do this. ;)
 
hings that are slowing me down right now.

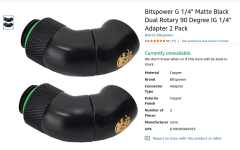
I want more black Bitspower 90 degree dual rotary bends.

1760638926440.png

I like these because they offer a more gradual bend than a hard 90 degree, and thus don't harm flow as much as tight 90 degree bends do.

I could technically complete the build using the bends I have on hand, but this would make some of them tighter than I'd like, and would also result in the colors being all mix and match, which I really don't like. Don't get me wrong. This is not one of those "bling" builds, but I also don't want to make it look like crap.

Adapters bends and fittings have been a bigger issue during this project than in my previous ones. Many places are simply out of stock.

My mostly local MicroCenter (30-60 minute drive depending on traffic) used to be a great place as they usually have a fully stocked Bitspower fitting and bend section, so if I needed to pop in mid-build to get something, they always had it.

Not this year. Presumably this is due to supply chain disruptions resulting from the tariffs.

I've been trying to pick up extra black Bitspower dual rotary bends for several weeks now, and have repeatedly been foiled.

My local Microcenter has largely been out. Except for one time when I popped in and they had 2 of them, which I bought, but I needed more of them.

Amazon has been out as well. Amazon is pretty much cornered by two marketplace retailers these days, Titanrig and Modmymods. And Modmymods only carries crappy Chinese fitting brands it seems. Titanrig has also been out of the dual rotary black ones for a while.

Two nights ago I did my regular check-in on MicroCenter's webpage, and they still had none in stock. So it was a surprise to me when I checked in while at work yesterday and saw that the system said they had 6 of them. Success!

I left work and drove the 30 minutes straight to MicroCenter, but when I got there they were nowhere to be found. The Bitspower drawers are a lot like the fastener and screw drawers at the Home Depot. People dig through them and put things in the wrong little drawers, so unfortunately, to find what you need, a lot of them time you need to look through every single drawer. (And there are a lot of drawers). I did this. Still could not find them. Then I asked an employee for help. He told me it was weird that 6 had just popped up, because they didn't have a truck that day.

But he went on a mission to help me none the less. He checked the returns area in case maybe they came back in from someone who had bought them. No luck. He checked their custom build area in case they were sitting there unused. No dice. They were very helpful, but unfortunately they just didn't have what I needed.

So then I had to drive the 60 minutes home empty handed. In total this wasted about 2 hours of my day, and I still don't have the parts I want to continue.

I was debating back and forth if I should just not be stubborn and assemble it with the parts I have, but I really don't want to.

On a whim I decided to check Newegg. And what do you know. They actually had them! Direct shippe3d from Bitspower themselves. (I hope this doesn't mean straight from Taiwan)

I haven't ordered from Newegg in a long time!

Sadly there was only one shipping option. The listing says "Fastest Delivery in 3 days", but when you actually check out, there is no way to select a different shipping method than the standard free shipping.

So now these won't get here until some time between October 17th and 23rd wasting even more precious time. So I guess I won't get the loop finished this weekend either. Sigh.

I guess there are a few things I can do in the mean time. More on that later.
 
That's actually an interesting idea. I think you should do this. ;)

My thought process is that from upstairs it will just look like a regular HVAC vent.

I'd probably install it "kickstand heater" style in the dead space under a kitchen cabinet.

In the server closet, well, that's a closed "non-public" space anyway, so who cares if it looks a little "ghetto" 😅
 
My thought process is that from upstairs it will just look like a regular HVAC vent.

I'd probably install it "kickstand heater" style in the dead space under a kitchen cabinet.

In the server closet, well, that's a closed "non-public" space anyway, so who cares if it looks a little "ghetto" 😅
I mean.. clearly... you do. Since you cant get the exact 90 degree bends you want. :)
 
Become a Patron!
Back
Top