So, my solution for the "weekends are not long enough and I don't want to be stuck without a work machine on Monday" problem is relatively simple in retrospect.
I just need another CPU cooler. Something I can use in my workstation temporarily, allowing me to break down the water loop and take the parts and the time I need to get it done right.
The problem? The Threadripper 3xxxx series used a one generation socket, and that was 6 years ago now. There weren't many cooler out there for it to begin with, and many fewer of them are still around today.
Before starting I read some reviews from back then. I know it is only going to be temporary, but I need it to work OK, and I may even wind up using it in the future when either this Threadripper (or the Milan Epyc in my server) gets moved downstream to secondary workstation duty, and I need a different cooler. SO I didn't want to just get some crap.
My first choice was going to be the Be Quiet! Dark Rock Pro TR4. It is still mentioned on Be Quiet's webpage, but this thing is unobtainable. No one has it, and I can't even find it used, except from one guy in Poland on eBay.
So yeah, that's not happening.
My second choice was going to be the
Noctua NH-U14S TR4-SP3.
To my surprise, this one can still be had, and was one click away on Amazon. Because I have read how it is difficult to tame Threadrippers without water cooling, I decided to go for a second
NF-A15 PWM fan just to get the most out of the cooler. Luckily Noctua plans for people doing this, and include fan mounting clips for a second fan with the heat sink.
It's not cheap at $109.95, but if it means the difference between making progress on the project and having the whole thing grind to a halt, it's what has to be done.
Unfortunately when it arrived there were signs that it had been opened. The bracket had been removed from the bottom and rotated in the wrong orientation, and there were fingerprints on the otherwise shiny cold plate.
Normally this would piss me of and have me initiating a return and replace, but then I'd have to sit around waiting for another cooler to arrive, and miss the opportunity to make progress for yet another week, so I cleaned it off, re-oriented the mounting bracket, and prepared to install it.
My original plan had been to just install the cooler in my existing case, and start pulling water cooling parts out of it, but the more I thought about it I didn't like this plan. There'd be potential dripping, and maybe I'd forget some part I needed and have to break into it again, etc. etc. So instead I just decided to do the transplant into the rack-mountable case now, and temporarily cool it with the Noctua cooler there, until the water loop is ready.
I knew this meant I probably wouldn't be able to close the 4U case because the Noctua cooler would be too tall, but it's not a big deal. It's temporary!
So I got started on moving all of the parts over to the Sliger rack-mountable case.
Can you believe that? 9 months and 139 posts in, and this build project actually starts doing some PC building

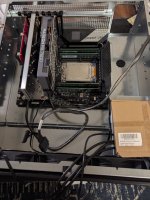
One thing I failed to consider prior to starting this project is that with 4U server cases, there is rarely any extra space. Things need to be crammed together to make sure everything fits within the 4 rack units. So when building a desktop system, there is usually space to route wires cleanly behind the motherboard.
There is no such space in a 4U rack-mountable case.
So wire management becomes a little tricky.
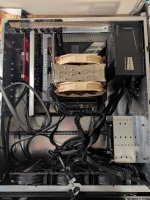
Sliger were kind enough to provide this bar across the case between the fans and the motherboard though. I'm not sure what it was really intended for (and last I checked they still don't have manuals for any of their cases) but it has lots of holes through it, so it seems like a
perfect place to zip tie wires:
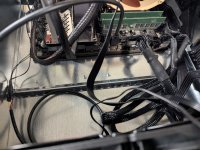
So I started my wire management.
I'm a little rusty at this, having not done good wire management in a long time, especially in a place where it would all be visible (unlike the good old
"shove everything behind the motherboard tray, and mash the rear cover closed whether it wants to or not" approach.

)
It was never going to be perfect, but many little zip ties, and a lot of cursing due to my large hands not fitting where I needed them to fit, I think I did OK.
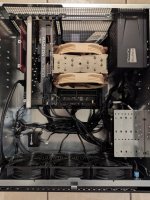
And yes, I was right about the cooler not fitting


But as previously mentioned, that is only temporary.
I did have some unanticipated issues though.
If you recall from many posts back, I decided to go with some badass server case fans, the
Silverstone FHS 120x.
These are
loud and powerful 4,000 rpm screamers producing gobs of both airflow and static pressure, but at low speeds they are actually quite livable, I figured it would be good to have a lot of spare fan capacity just in case I needed it, but anticipated running them at low speeds most of the time.
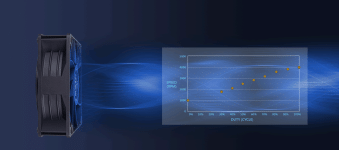
Silverstone's design of this fan is actually quite cool, in that they allow you to use the entire PWM duty cycle range to get the speed you want. 100% duty cycle may be a deafening 4,000 freaking rpm, but at 0% duty cycle, they sit at a rather civil 1,000rpm. At 35%-40% duty cycle they make some noise, but really not any more than any other high performance desktop fan does at around 2000rpm.
My plan was to stay in the 0% to 30% range most of the time, and only allow them to kick in to high gear if things were getting unusually hot.
But then Asus had a problem with that.

Asus Q-Fan control is pretty nice, but the problem is Asus thinks that you - their customer - is an idiot, and they have decided to limit how low of a duty cycle range you can configure for your fans.
Yes, if you use Q-Fan tuning you can unlock lower duty cycles than are available out of the box, but it would seem like there are also hardcoded minimums that cannot be changed no matter what.
CPU_FAN and CPU_OPT: These seem to never be allowed to be set below 18% duty cycle no matter what.
CHA_FAN1 and CHA_FAN2: These seem to never be allowed to be set below 26% duty cycle no matter what.
W_PUMP1 and W_PUMP2: The Q-Fan Optimizer doesn't even test these, and they seem to never be allowed to be set below 20% duty cycle no matter what.
Well, I don't want them to scale with the CPU, so the best I could do was connect them to one of the pump headers. At 20% they are sitting at like 1,850 rpm, and that is much higher than I had hoped.
With the door closed, I can't hear them from my office, but I still don't like the fact that they are constantly running at this high speed.
I'll have to see if I can live with it. Otherwise I'll just swap in some of my old 120mm Noctua industrial fans. The good lord knows I have enough of those in my current build, that will soon be "unemployed".
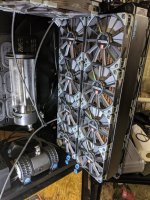
...but it will be a shame to have these awesome Silverstone fans go to waste.
As for the Noctua cooler? I installed it as instructed with the included Noctua paste, and using the dot pattern recommended in their manual. (a 3x3 and 2x2 pattern interposed on each other for a total 13 dots of thermal paste). Once I was up and running, I decided to do a quick test to see how it held up.
I ran mprime (the Linux version of Prime95) maxing out all 48 threads with small FFT's which they claim is worst case for heat.
The Threadripper is rated at a max temp of 80°C. Once I started the stress test, the CPU temp immediately shot up to 68°C, and then kept slowly rising up to ~78°C. I forgot to check the CPU clocks, but I wouldn't be surprised if it was throttling, or at the very least not achieving its best turbo clocks.
It's good to know that it works, but I probably would not want to daily a Threadripper with this cooler.
But again. It is temporary.


